I am working on a project for my class… a washing machine/dryer combo and since I am new to Rhino, as intuitive as I am finding the software, I am getting stuck every now and then. Well, here is my current issue:
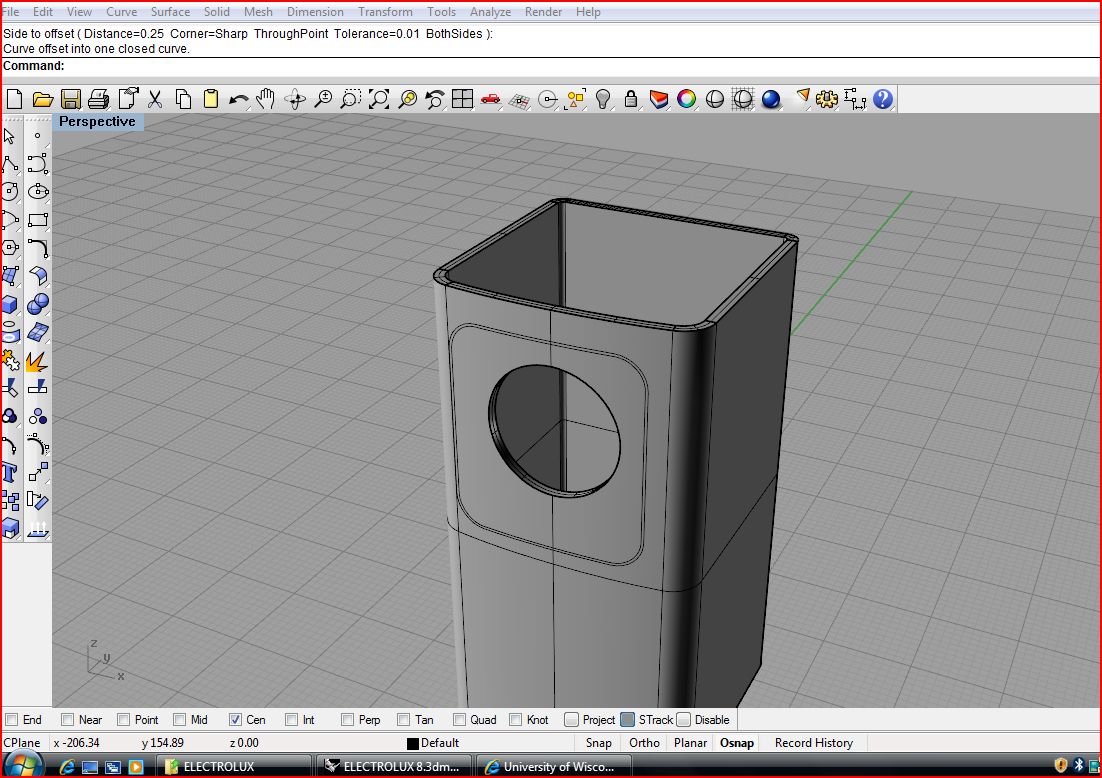
I am trying to create a “door” to the washing machine element of this unit and I don’t know which is the best tool to use. I have tried trim/split as well as wire cut, etc. When I use those features though, I get this nasty bunching up in the corner of my model! Not sure why. I am including images of what I am trying to do. So far, I have projected curves onto my surface in the shape that I want. The door to my washing machine will be a rounded square with a hole cut in the middle of it, as shown . That hole in the middle will be the glass window of the washing machine door. I hope I am explaining myself well.
What tools in Rhino should I use that will give me a better result other than trim/split? How else would you guys create this “door”, if you had to?
By the way, that “bunching/crinkling” effect that shows in my model, doesn’t show up until AFTER I start to cut into the walls of that solid. How else would would a door be created on a model or give the effect of a door there? Oh, and the door will not open when I render it in Keyshot. It will just be closed for now, at least. I know for sure that to render in Keyshot, all the parts have to be separate layers, (that door will be a different material than the rest of the unit) so that door has to be cut out and put on a separate layer, so I need help guys.
Thanks MP designer, I hadn’t known about that setting.
I will try it out tomorrow and let you know if it fixed the problem. This student is working on a math assignment (ugh… hate general ed’s!).
Do you think though that creating a door that way, using the trim function is the best way to create the “door”? What I did was extruded the two curves through the surface, then used trim (trimmed out the space between the two new extruded surfaces to release that door surface from the main unit)? How would you go about it? Thanks MP.
Trimming it would be the easiest way of doing this. Either trimming via projected curves or creating an extrusion of your shape and intersecting that then trimming away the excess.
I would most likely split the exterior surface with projected curves and (depending on the level of detail of the model) use the edges of the trimmed surfaces as a starting point to build out the detail of the door and body sections using curve network or sweep 2 rails. If you are just doing an exterior with no real open/door detail or shots with the door open, that level of detail is probably unnecessary at this juncture.
I agree with the mesh settings. It’s really just an artifact that will probably be eliminated by going to “smoother and slower.” Otherwise, just accept it…it’s not really part of the geometry so the final production part would never reflect what you see on screen. It’s a major B*tch when rendering though!
MPdesigner, thanks for the tip about the mesh settings! It worked! Just wanted to update you and say thanks to you and all who offered assistance.
As for the cutting of the door opening, I offset the curves of the door to create two, extruded them and then used trim to cut the parts i didn’t need and joined the parts i wanted. Worked great!