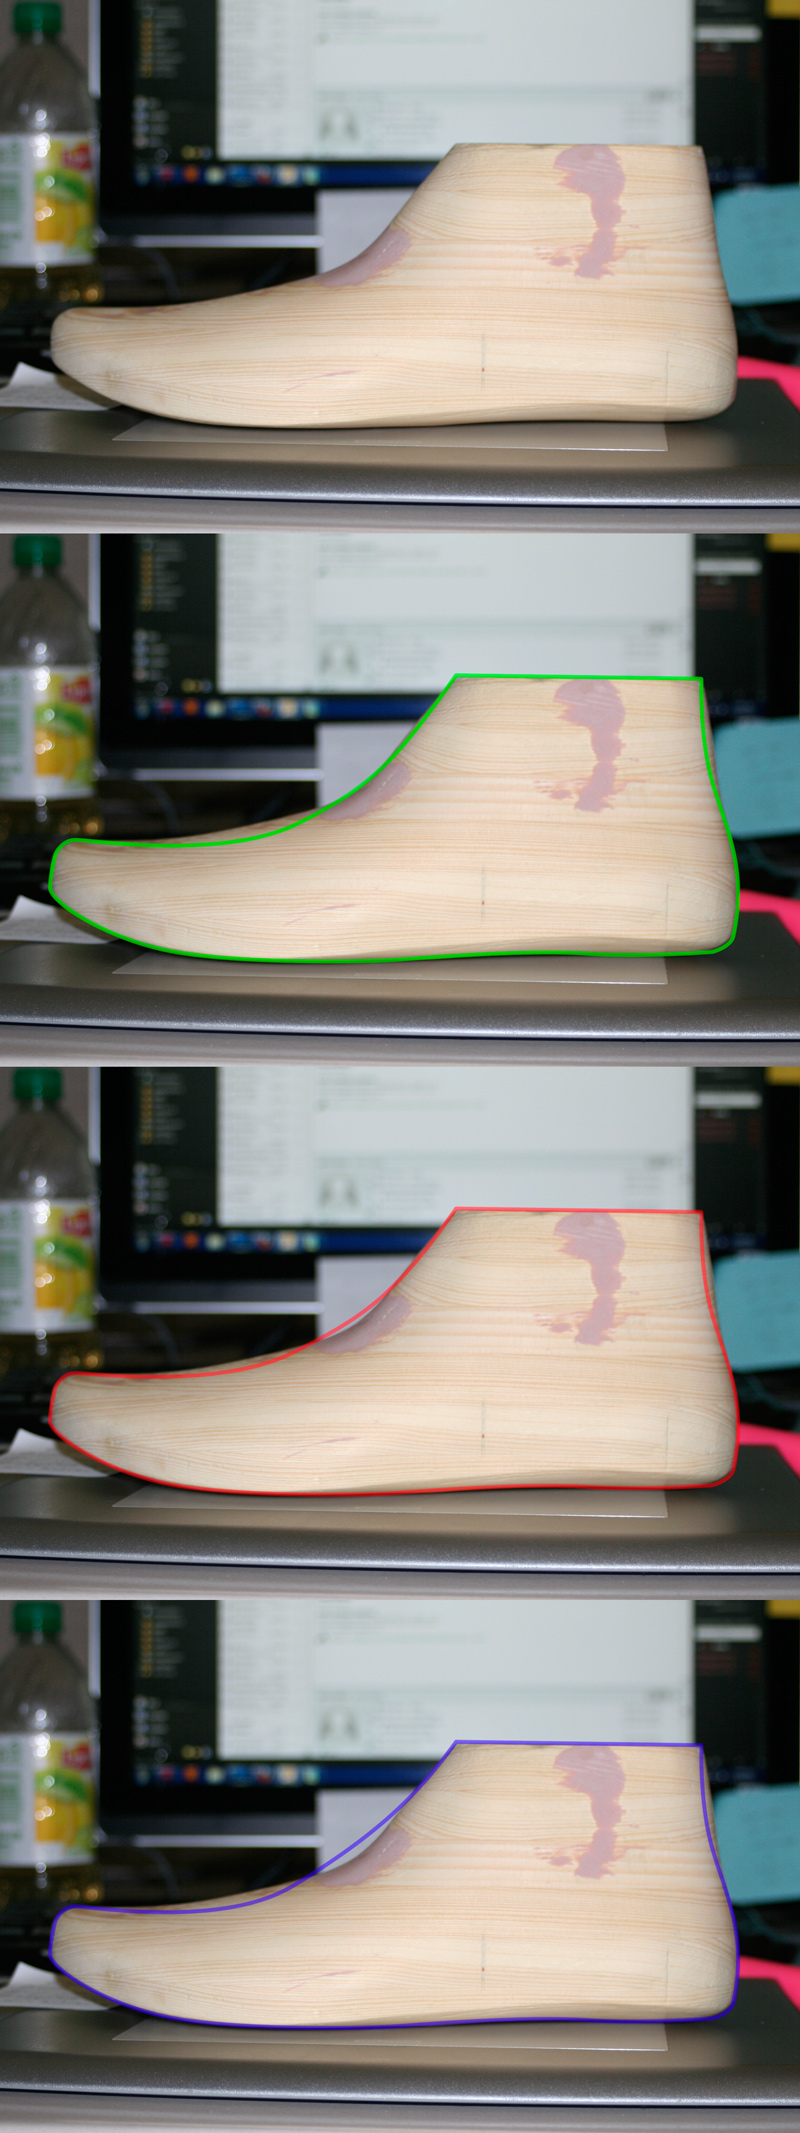
So I’ve been pretty inspired as of late by all the guys making their own shoes in sketch fu, so I decided to give it a go. I went and got this far based on measurements taken from my own feet, and pictures of lasts from a shoe making book I have, but I can’t seem to nail down the right profile for the instep. I attached an image with a couple ideas I had ( I’m hoping for the green one since I wouldn’t have to add anything), but I figured I would ask the experts before I went filing away again!
Also, if you are just using it to handmake a shoe, I think how you have it is cool. It won’t be perfect. To me, its about learning how that materials work together and interact with one another.
lol, I didn’t realize you didn’t for your shoe, it turned out awesome! I wish there were some better tutorials out there for doing the homemade footwear thing, all I’ve found is this:
which is helpful, but a little more involved than I was hoping for my first go around, though it’s basically the process I plan on using.
I ended up getting the last down to the look of the green line, though i’m still concerned about it being to thick.I’m a little tired of hacking away at it though, so now I think it’s time to see what it looks like when I start to figure out a design/pattern…wish me luck!
For the instep I think you need more meat in the heel. The arch goes too far back. The green line looks good in the forefoot.
Key measurements for a last are-
-toe spring
-heel spring
-stick length
-bottom length
-cuboid shape
-instep length
-toe to heel rise
-ball girth
-waist length
R- Does that mean I should add material to the underside of the last and flatten it out a bit? I think I see what you’re talking about, like the apex of the arch should line up with the top of where the tongue would be?
When I shaved it down to the green line, I ended up flattening the bottom of the last around the heel area, kind of raising the back up a bit. At first I had kind of wanted to do just a flat bottom with no real arch to the sole, but I decided to add a little height to the heel…you think it’s time to get out the bondo?
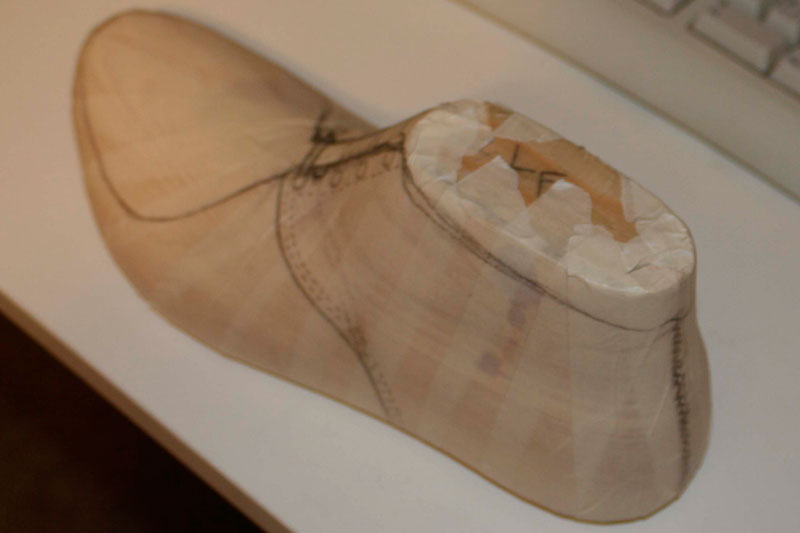
Unless you are really able to skive the leather, you might find that the build up of material where the toe box hits the eye stay might not be desirable. You could consider moving the intersection of the toe box and the quarter panel down a bit, which might give it a little more flex as well as visual interest…
That makes sense…part of me is thinking of just having a plain toe box for now, since this is the first go around…the thought (and I just redrew what you did above on the last, which still works!) was to visually take the eye from the front of the toes and up to where the eyelets are. Plus I have a pair of hush puppies that have a toe box like that, and it helps (I think) solve some of the weird tenting issues in that area and allows to flatten out.
It’s amazing to me how just carving the last has and now sketching on it, has provoked a lot of thought and questions about construction.
You can hand - skive the leather if you get a scalpel with a thin and long enough blade. It takes a bit of practise, but it’s doable.
We didn’t really use clicking knives as students, for our toolkit we were asked to buy Swann Morton Ltd. No. 4 handle scalpels with No 26 blades.
If you are careful and the leather has substance to it, then you can hand skive. As a student I often took home leather and eva sheets in the summer holidays, for my own projects. I got pretty good results on a domestic sewing machine with thinner weights of garment leather and suede sewn with a leather needle.
My efforts did tend to be open toe and slingbacked, though, due to lack of a post sewing machine and heel and toe stiffeners.
By the way, your efforts with a last are good. If you were in the UK, I’d be on the phone to Springline Last makers (a long time friend of mine is a director) he’d be taking you on.
Thats quite the compliment! Sandals might have been a better idea than starting with this boot…wish I had thought of that…but I’ve learned a TON so far, and if it keeps like this throughout the whole process I think I’ll be a lot better informed the next time I sit down and start sketching shoes.
Do you have any suggestions adhesives to use when attaching the outsole? I’m still a bit lost on that part, as well as how to press the upper and I guess it would be called the midsole down onto the outsole so that I get a good seal?
Mike,
your still in grand rapids right?
Wolverine has a mold/model shop that would have adhesives for footwear, as well as perhaps some other things you may need. i dont know who all you have been talking too in the past year or so, but if im your best contact within WWW you should come to the Grid office downtown GR with what you have, we can talk a bit and maybe get you in touch with someone in the shop that you might be able to work with as far as tools, adhesives, etc.