I got the bike in yesterday after waiting 27 days for it to be delivered since date of purchase. I started to tear the bike down to get the frame ready for powdercoating. Apparently it has been painted alot. I believe the original color was red, then school bus yellow, green, two shades of blue and finally black. It looks like all the cables have to be replaced due to their age. The wiring in the headlight bucket was a mess and it took me awhile to sort that out. I’ll have to figure out a better way to wire this thing when I build it back up. I’ll try to keep this thread updated but I’m torn between work, my mba program and this lil project. But I’ll do my best to take pics and keep this thread updated.
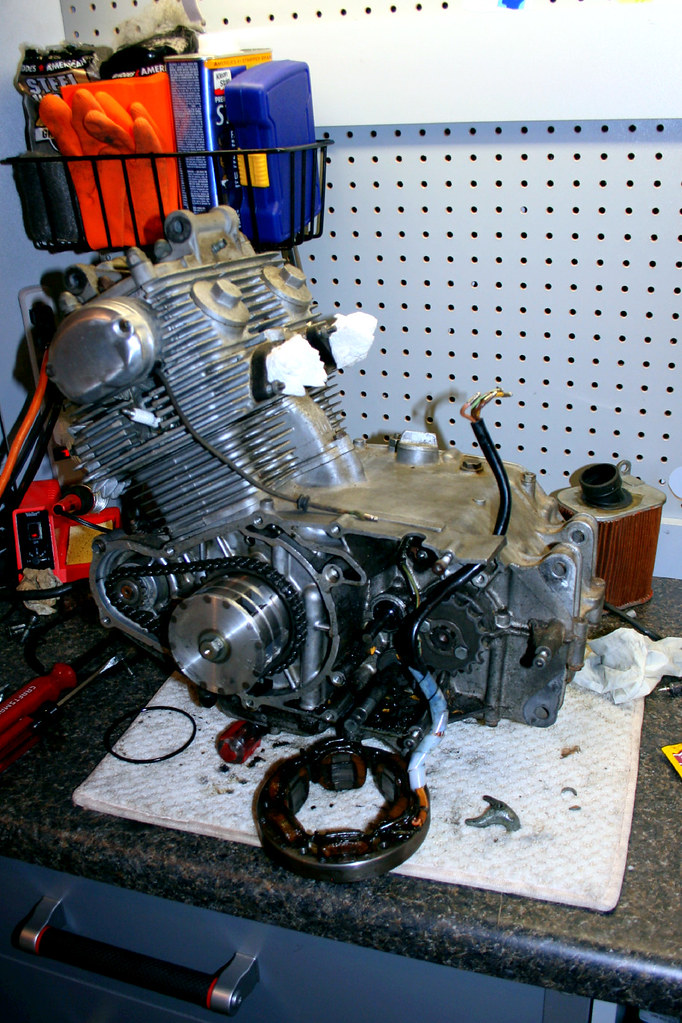
I’ll be checking the compression and pulling the motor and start inspecting that next.
Of course, as I build it back up I will be looking for opportunities to insert some neat little design elements into the build.
No baffles and the bottom of the pipe is well rusted through. I have replacement pipes from a CL. So I have to mount the brackets from this set onto the new pipes.
This is about as far as I got today. I’m considering relocating the battery, but I haven’t figure out how to accomplish that yet. I may get a smaller dry cell and hide it under the seat.
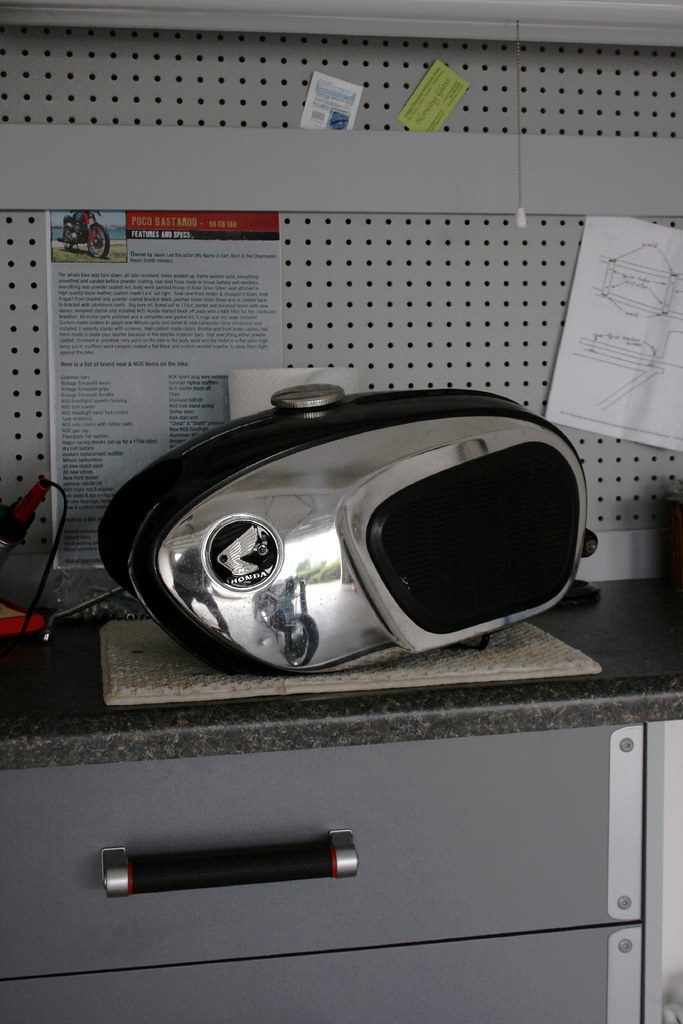
Tank is in pretty good condition as well as the pads. There is some rust in the tank, which I’ll need to remove. Poco Bastardo in the background keeping me inspired.
Oh mannnnn… I had a CB160 when I was in high school. My first motorcycle; it was new at the time; $590 out the door in 1969. … Two my my riding buddies lusted after it; they rode 90 Super Hawks. Are you going to do a restoration, or cafe it out? Judging from your pics, you have a great specimen to do a resto on. But there are some really nice cafes out there.
As a long time motorcyclista, I would have suggested a period of riding, to get a feel for it’s “needs”, before tear down, but hey… …
Somewhere in a drawer, I have a pile of old vintage Honda “Flying H” embroidered patches, I’ll see if I can find them.
A word from a previous owner: If you haven’t already loosened those cast aluminum tappet covers be really careful; they would “round off” even when they were new if you did’t use a good 6-point socket on them (don’t use the one in the tool kit (if you were thinking of using it (or even have it))). At least some PO replaced those damned Phillips Head side case screws with Allen socket heads; it used to take an “impact driver” to get those screws out, again, even when new.
Cool project.
I would have posted in the “Project” section, it might get more following there.
I believe I will be going the cafe route like the Poco Bastardo bike you posted. I thought about a restoration but those NOS parts are incredibily expensive and hard to find. Those chrome panels are definately staying on the bike. They are my favorite element of the whole thing.
I was going to ride it before I started. But, I still need to go through MSF and I “technically” have never ridden a motorcyle yet. I’ve raced alot of mountain bikes but nothing with a motor. I had also planned a complete teardown of the bike regardless, so in a way it didn’t really matter as I was going to get into everything.
I was gonna post this in the “project” section but I didn’t know if it was relevant enough to go in there. Maybe a mod can move it over there?
Just noticed this bracket on the rear wheel was busted. The search begins to find a replacement. At the very least I suppose I can use this to practice my polishing skillz yo!
Rust on one of the exhausts. Right after this I found out the replacements I got do not fit the bike. I will need to ponder my next steps in regards to replacing this wonderful, seasoned piece of hardware.
Where does the exhaust have an issue with fitment? You can always adapt the two together, there looks to be a ridge near the pedals that might make a good place to weld in the new section. You could also think about buying a series of bends online, cutting them as you fit them in, and then brazing/tacking them together. A machine shop could weld them up and smooth them down nicely for you.
A very good idea. The replacement mufflers were the same style as the originals but on the inside facing of the muffler canister there were different recesses than the original. I may do one of two things… I could weld the old brackets to the replacements. Or, I could use this as an opportunity to make a custom system and maybe through some unique mufflers on there.
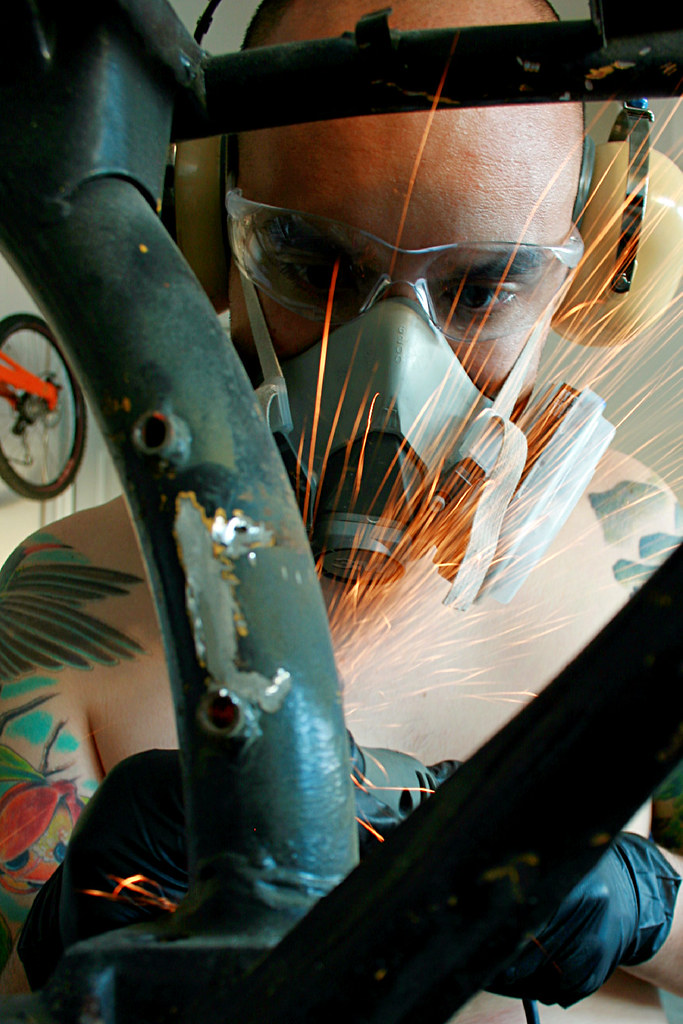
I got alot done tonight. Now, everything is nice and smoooovveee. Any recomendations on how to strip the paint? Should I use a chemical stripper or sand it down?
To be honest, I’d really suggest having it all sandblasted down. Not dealing with Airplane Stripper alone is worth the price, plus most small mod shops will have a booth and charge pretty cheap for sandblasting anything that can fit. The finish is usually really nice too, allows new paint to adhere great and completely removes signs of aging. Nothing like taking a 10 year old beat up piece of aluminum and making it look brand new!
Judging by all the layers of paint you can see where you grinded and some of the more intricate shapes of the frame it really might be worth just having someone else deal with the mess of paint removal.
I recently had a full set of charge pipes blasted down, ended up liking the finish so much I had them powder coated clear!
If you really wanted to do it yourself, airplane stripper + flapper sand paper wheels for an air grinder + respirator would be a good start. That and your ability to smell for a couple weeks.
Yes, after a few days of looking around the interwebs, you guys are correct. I’d really like to do as much as possible on my own. So I’ve found an outdoor unit that I can use in my backyard.
Boo, be aware that a sand blasted steel surface is going to rust immediately. If you pick it up with bare hands, you’ll have hand prints on it by the end of the day, or sooner. (so don’t handle it will bare hands).
Have whatever primer/sealer you want to use ready to go. Don’t substitute the cheap “rattle can” primers for this first coat; you want molecular level adhesion at this stage. Do not use a simple “primer”, they are porous and will allow moisture (from wet sanding) to penetrate through to the steel = rust under your coatings; use a “sealer”, or “primer/sealer”. Get the good stuff (from an auto supply shop), and a gravity-feed gun for the project (it’s a good tool to have and you’ll need it later to paint anyway).
You worn out that little Dremel yet ?
Here’s a really good source for tools that will help.
Several years back I restored a 78’ Honda CB 650. This thing had 12 coats of paint (at least) on the tank. Not wanted to use Airplane stripper as I had in the past (freak all toxic). I found an alternative water based stripper in the automotive section at Wal-Mart. It worked wonderfully. Took all paint off to the bare metal. I just put it on let it sit for a fifteen minutes and wiped it off with steel wool. gave it a second coat, wire brushed the seams and welds, wiped it down with alcohol. Bare tank. The name escapes me right now, but it is in a plastic bottle with a spray nozzle. I highly recommend this stuff. Non toxic. No smell, Inexpensive. I’ll try to find out the name next time I’m at wally world. Hope this helps. Great bike. I need another project like this again.
Hahaha, no I haven’t. (See pics below) Thanks for the reminder about the rusting of the frame. I might as well do my welding first to get that out of the way then. I have to fill a few bolt holes on the frame and weld a couple supports for the cafe seat. As for tools I’ve been using harbour freight and northern tools. I consider everything in those stores “single use only.”
Harbor Freight, and Northern both inhabit my tool boxes too. HF sell blast media at a reasonalbe price, aluminum oxide, and walnut shells as well. Walnut shell leaves a nice “semi-matt” surface that looks good under clear finishes.
Check these out if you’ve never seen them before. 3M Clean ‘n’ Strip discs.
Considering all of the excess bracketry that you have removed from that frame, these discs would be able to get to a lot of areas. They flex a bit (so they’re great on tubular surfaces) are available in several “grits” and work really well to give an even surface, without digging in like a “regular” abrasive disc does.
The next thing I’d get would be [link] 3m Surface Conditioning Discs; they are flexible and very surface compliant, and leave a surface finish that looks almost polished, as opposed to “ground”. I’ve used them on a couple of gas tanks; they really minimize the amount of surface fill and sand work because they don’t leave heavy grind marks.
[the disc in the center with the black plastic “male” stud is a Roloc disc. The “female” metallic sockets are SoCatt system components.]
Get the quarter-turn on/off “Roloc” 1/4" dia. mandrel, it works with any 3m “Roloc” system disc.
Sources:
I find them at the local Ace Hardware store. Harbor may have them (but I doubt it).
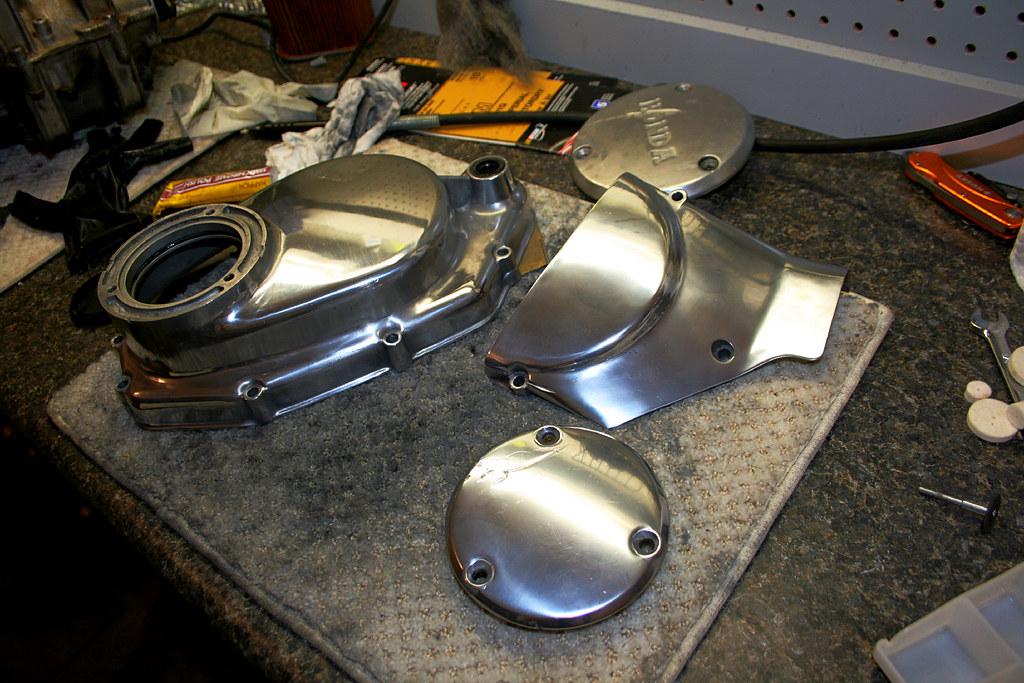
The past couple days I’ve been polishing some parts. I have about three more pieces on the motor I would like to polish. But this is what I’ve done so far. That large casing was very difficult for me to polish. The irregular shapes were just hard to navigate around. Overall, I’m happy with the results although one piece (top right) still has a LITTLE milky look to it. I’m not sure what that’s about. But, I did redo it from the picture posted previously and there is significant improvement. I have been sanding the pieces with 600 grit and then 1000, and then buffed with ebony, white and then rogue.
deja vu… … . the generator cover may be a different aluminum alloy than the cases (which are looking GREAT by the way). I’m really surprised that old aluminum is coming up as well as it is.
Grade wise, what rogues are you using?
The valve tappet covers came loose okay I take it?


